Product FAQs
Select the product series you would like to know more about:
Qx Series FAQs
Products Covered: Qx, QxL & QxP
Q: How do I upgrade the software for Qx with no LAN connection?
Instructions for updating your unit running V3.4.2 or earlier with no LAN connection.
1) Download supplied software. Make sure to save to your desktop before extracting the .bin file to the root directory of a FAT32 USB memory stick.
2) Make sure the unit is turned OFF before upgrading.
3) Insert the USB into the front panel USB port.
4) Press the start button TWICE in succession.
5) The ON icon will flash several colors, starting with magenta and the fans will be on full. Magenta indicates that the unit has recognized the second button press. Please wait approximately 4-8 minutes as the unit upgrades. The unit will automatically show the menu screen when complete and the ON icon will remain steady white in color.
Instructions for updating your unit running V4.1.1 onwards with no LAN connection.
1) Download supplied software. Copy the .zip file to the root directory of a FAT32 USB Stick.
2) Make sure the unit is turned OFF before upgrading.
3) Insert the USB into the front panel USB port.
4) Press the start button TWICE in succession.
5) The ON icon will flash several colors, starting with magenta and the fans will be on full. Magenta indicates that the unit has recognized the second button press. Please wait approximately 4-8 minutes as the unit upgrades. The unit will automatically show the menu screen when complete and the ON icon will remain steady white in color.
Note: You will need around 500MB of remaining space on the USB device to be able to extract and complete the upgrade.
Q: How do I remotely upgrade the software for Qx?
From Qx software version 3.3.1 you can upgrade the software on your Qx unit(s) from a remote location as follows:
1. Complete and submit the access request form on the software download page.
2. Download the .ZIP file for the desired software release, see above.
3. Extract the file phab_qx_upgrade.bin to a suitable location on your workstation.
4. Log on remotely to a Qx to be upgraded using SFTP, enter: sftp qxuser@<Qx_IP_Address>.
For more information, see the section "Using Secure FTP (SFTP)" on page 3-25.
5. Enter the password for the qxuser: phabrixqx
You should see the message Connected to qxuser@<Qx_IP_Address>
6. Use the SFTP put command to upload the Qx upgrade file to the upgrade directory of the Qx:/transfer/upgrade.
You should see the percentage completion and time remaining for the transfer displayed at the right of the terminal window.
7. On completion of the upload the Qx automatically detects the presence of the upgrade file and starts its upgrade cycle.
Note: The remote upgrade function requires Qx software version 3.3.1 or higher to be installed on the target Qx. When this software version is available you can choose to install any available version of the Qx software. If, however, you install a version below 3.3.1, the remote upgrade facility will no longer be available on that Qx.
Q: Which SDI SFPs does my Qx / QxL Support
The following SDI SFPs are recommended for use in both the Qx and QxL for all Mezzanine ID’s.
|
Description |
Manufacturer |
Part Number |
|
SDI Transceiver |
|
|
|
SDI Coaxial Cable HD-BNC Tx/Rx Transceiver |
OPTOWAY |
SPE-2100VWG |
|
SDI Optical Fibre 1310nm Tx/Rx LC Transceiver |
OPTOWAY |
SPS-2110VW-1T1RG |
|
SDI Dual Receiver |
|
|
|
Dual SDI Coaxial Cable HD-BNC Receiver |
EMBRIONIX |
EB12HD2R-MNR-2 |
|
Dual SDI Optical Fibre 1260-1620nm LC Receiver |
OPTOWAY |
SPS-2110VW-2RG |
|
SDI Dual Transmitter |
|
|
|
Dual SDI Coaxial Cable HD-BNC Transmitter |
EMBRIONIX |
EB12HD2T-MNR-2 |
|
Dual SDI Optical Fibre 1310nm LC Transmitter |
OPTOWAY |
SPS-2110VW-2TG |
The supported SDI link rates for Single, Dual and Quad Link operation and the number of SFPs required for each type of operation are as follows:
|
SDI Transceiver viewed from rear of unit |
|||
|
Link Type |
Number of SFPs |
Rx-Ch1 Link Rates |
Tx-Ch1 Link Rates |
|
Single Link |
1 |
1.5, 3, 6, 12 Gbps |
1.5, 3, 6, 12 Gbps |
|
Dual link |
2 |
1.5, 3, 6 Gbps |
1.5, 3, 6 Gbps |
|
Quad Link |
n/a |
n/a |
n/a |
|
SDI Dual Receiver viewed from rear of unit |
|||
|
Link Type |
Number of SFPs |
Rx-Ch1 Link Rates |
Rx-Ch2 Link Rates |
|
Single Link |
1 |
1.5, 3, 6, 12 Gbps |
n/a |
|
Dual link |
1 |
1.5, 3, 6 Gbps |
1.5, 3, 6 Gbps |
|
Quad Link |
2 |
1.5, 3 Gbps |
1.5, 3 Gbps |
|
SDI Dual Transmitter viewed from rear of unit |
|||
|
Link Type |
Number of SFPs |
Tx-Ch2 Link Rates |
Tx-Ch1 Link Rates |
|
Single Link |
1 |
n/a |
1.5, 3, 6, 12 Gbps |
|
Dual link |
1 |
1.5, 3, 6 Gbps |
1.5, 3, 6 Gbps |
|
Quad Link |
2 |
1.5, 3 Gbps |
1.5, 3 Gbps |
For the SDI SFP recommended location for Single, Dual and Quad link use cases and user controls please refer to the manual.
Q: How do I bring up my QxL 25G link?
Please ensure that the correct single rate IP/Ethernet 25G SFP that matches the fibre type being used is fitted in the QxL (see Which IP/Ethernet SFPs does my Qx / QxL Support FAQ). Note the correct SFP type to match the link rate and fibre type must also be fitted in the IP Switch.
Please ensure that the required Forward Error Correction (FEC) type has been configured in both the IP Switch and the QxL.
The QxL supports either IEEE 802.3by Reed Solomon FEC (RS-FEC), or no FEC (NO-FEC) without auto-negotiation. The QxL default is to use RS-FEC.
The IP switch interface should be configured to use RS-FEC with FEC auto-negotiation disabled.
This will provide the highest possible level of data integrity on the 25G links
Q: How do I get started with ST 2110 on the QxL & QxP?
The short video below explains how to get started with ST 2110 on the QxL & QxP, covering GUI navigation and basic configuration.
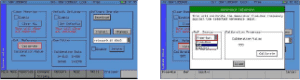
Q: How do I install my Qx software options?
You can order and install Qx optional software toolkits at any time after purchasing your unit. You will receive an email from PHABRIX with an encrypted file attachment: Encrypted_file.enc.
Install the software for a Qx toolset option as follows:
1. Make sure that the Qx unit is powered on.
2. Download the email attachment and copy to a blank, FAT32 formatted USB memory stick.
3. Insert the USB memory stick into any of the USB ports on the front or rear of the Qx.
The Qx detects the software package and displays a dialog box listing the licenses currently on your Qx alongside the new licenses available with the option upgrade.
Q: Which IP/Ethernet SFPs does my Qx / QxL Support
Qx: Units with Mezzanine ID 0-9 support 10GBASE-SR (850nm) or 10GBASE-LR (1310nm) MSA SFP+ Ethernet Optical Transceiver Modules supplied by PHABRIX.
Units with Mezzanine ID 10 upwards may use either PHABRIX supplied or third-party:
- 10GBASE-SR (850nm) or 10GBASE-LR (1310nm) MSA SFP+ single-rate Ethernet Optical Transceiver Modules.
10GBASE-CR Direct Attach Copper (DAC) Cables are not supported.
QxL: All QxL units support the use of either PHABRIX supplied or third-party:
- 10GBASE-SR (850nm) or 10GBASE-LR (1310nm) MSA SFP+ single-rate Ethernet Optical Transceiver Modules, or
- 25GBASE-SR (850nm) or 25GBASE-LR (1310nm) MSA SFP28 single-rate Ethernet Optical Transceiver Modules, with Reed-Solomon Forward Error Correction (RS-FEC).
- Multi-rate operation is not supported.
10GBASE-CR, 25GBASE-CR and 25GBASE-CR-S Direct Attach Copper (DAC) Cables are not supported.
Q: How do I create a preset in my Qx?
Whenever you work with the Qx, you can save your current screen layout and settings as an Instrument Preset for ease-of-use and convenience. If you decide to start a different task, you can launch a Preset from the Preset Bar with a single click, rather than opening and adjusting individual Instruments.
You can save multiple Presets as required, giving you a library of bespoke layouts tailored to specific operational tasks. The Qx saves each Preset to the Preset Bar, located below the Instrument Bar, and automatically labels each Preset sequentially as New Preset 1, New Preset 2, etc.
Once you have organized the display with your required Instruments, save as a Preset by right-clicking the Instrument Bar and selecting the option Save System State As Preset from the menu.
A saved system state Preset saves the following items:
- Layout of currently active Qx Instruments
- All user-defined settings in the active Instruments.
- All user-defined System settings, for example, Display Brightness.
On saving a Preset, the Preset Bar opens below the Instrument Bar, with the current screen layout saved with the default name New Preset n.
To rename a Preset, right-click the preset name and select the option Rename Preset. The Preset Rename dialog is displayed, enabling you to rename the Preset using a connected USB keyboard.
Q: Please could you provide me with the complete list of Qx REST API requests?
Please contact support@phabrix.com with your serial number to access the list of REST API requests.
Q: Does my Qx device require periodic calibration?
Just like any other product used in the broadcasting industry, we recommend an annual calibration for our products. However, it is down to the end user to decide whether to carry out the annual calibration or not depending on how the equipment is used and their QA requirements.
If the acquired measurements are critical like in a Manufacturing or broadcast environments and the results are dependent on this instrument’s measurement, then we would recommend an annual check and calibration.
We can provide a traceable factory calibration for our products only using calibrated & traceable third party equipment which is part of setting up our products prior to dispatch.
Sx Series FAQs
Products Covered: SxA, SxE, SxD & Sx TAG
Q: My Sx Won't start up
Please use this document to diagnose the problem
Q: Why do I need to keep my Sx firmware/software up to date?
It is important to regularly check for updates and ensure that your equipment is running at its best and that you benefit from any new features, improvements and fixes. Whilst it is always our intention to allow users to update to the latest version from any previous version, this is not always possible. In certain cases, for example when new options are introduced, the automatic update system cannot function because files required for the update are not present in the currently installed version.
In these cases the release notes available in the Support – Software Release Page of the web site will detail specific manual instructions that may be required to install the latest version.
To ensure that your Sx instrument is up to date, use the Update function:
1. Ensure that the Sx is connected to a LAN that has internet access and that the Sx has the correct network configuration.
2. In the “System” – “Engineer” menu select the “Download” button. This will instruct the Sx unit to check the PHABRIX web site for the latest version of Sx firmware/software. If the currently installed software is up to date then no other action is necessary. If there is newer software this will automatically be downloaded and placed in the dropdown list for installation.
3. At this point it is worth checking the Software Release Page on the website to see if there are any specific instructions about the release.
4. Once you are happy that you have taken all necessary precautions proceed to install the newly downloaded version.
Video Guide -
Q: How do I activate my new Sx software options?
- Power up your Sx unit, go to “Option Security Code” section located in the System → Misc. tab.
- Navigate using the arrow keys to highlight the code section then press OK to enter the new code.
- Clear text then enter the new code that was provided to you and then press the “OK” tab (the code is not case sensitive).
Video Guide -
Q: Does my Sx TAG include Composite and SD/HD SDI Generation as standard?
Sx TAG units with serial numbers including and greater than #006376 will include the Composite
and SD/HD SDI Generation toolset as standard. Sx TAG units with serial numbers including and less than #006375 do not have the Generator toolset as standard. The Generator toolset is available to purchase with option code PHSXO-GEN.
Q: Can I control my Sx unit remotely?
Yes, simple functionality of the Sx unit can be controlled and monitored in a web browser by connecting your Sx unit to a network using an Ethernet cable. Type the IP address of the Sx unit in the browser (connection is not realtime, there is a time delay depending on network traffic).
Q: How can I take a screen grab from my Sx unit?
Bring up the screen you want to grab, press and hold “OK”. You will hear a notification sound and a message with the file name of the screen grab. You can access the screengrabs from a browser or FTP to the Sx unit.
Q: I get an error message "INVALID version" when trying to install new software.
We have disallowed installation of software earlier than the original version that was installed when the unit was released, as some customers were installing old and incompatible software to the hardware revision on their Sx units, which was causing them to stop working.
If you need to go back to the default version that was first installed in the Sx unit, press and hold the Left and Right cursor keys while turning a unit on. This will revert the Sx to the software version it was shipped with. You may then install any newer version (some Sx units may require a multi-stage upgrade if the software revision is earlier then 0.10.0109).
Q: The LCD on my Sx has gone completely dark green!
If you press a Tab menu button twice, it displays the input SDI signal in a full screen window. This speeds up looking at the input signal and then going back to the user interface. However, if you have no signal it will display a full screen of “No video” which is dark green.
Q: Do you provide repair parts including BNC connectors?
We do provide a service to repair Sx units and we also provide specific parts for end users to carry out the repair themselves (including BNCs in your case).
Q: My Sx unit powers up successfully but is not displaying any video from the SDI source?
Sx Unit: To begin with, please check that the generator of the SDI output is turned ON. Using a short BNC cable, connect the Sx unit SDI Out to its SDI In. Go to the Analyser screen and make sure that the SDI source dropdown menu is set to "In1", this is located on the bottom right side of the Analyser/Picture screen below the Curser menu.
Sx TAG Unit: To begin with, please check that the generator of the SDI output is turned OFF. Using a short BNC cable connect the external SDI Out to the Sx TAG SDI In. Go to the Analyser screen and make sure that the SDI source dropdown menu is set to "In1", this is located on the bottom right side of the Analyser/Picture screen below the Curser menu.
Q: Can I reformat or replace the micro SD card in my PHABRIX Sx?
Yes, contact PHABRIX support with your Sx six digits serial number located on the back of the unit to acquire the relevant procedure to for your product.
Q: Sx ‘Free Run Frequency’ Calibration Guide
- Connect the PHABRIX Sx 5V power supply and switch the unit on and allow for at least 30 minutes warm up time.
- Connect the external signal Bi-level or Tri-level reference to the ‘REF IN’ BNC.

- Select from the TFT display: System ► Engineer
- Use the cursor control keys to select Calibrate button then press OK.
- In the opened window set the Ref. Source dropdown menu to Ref., Highlight Calibrate then press OK.
- When the reference is being calibrated check the displayed number in the open window. It should fluctuate between 512 and 700 before settling to 580-620 as a final value.
- After calibration to check the reference remove the cable from REF IN BNC. The reference figure displayed in the menu bar should turn to ABSENT in RED.
- Reconnect the cable to relock the reference. The reference figure displayed in the menu bar should turn to the set reference value in solid BLACK.
Reference Calibration Complete.
Video Guide -
Q: My Sx handheld needs a new battery – can I order a replacement?
As common with all lithium battery-based products, batteries lose around 20% capacity per year. Therefore it’s usual for our customers to need battery replacements for their Sx devices every 3 to 5 years. Please see our battery replacement page to choose from one of our three service options to order a replacement.
Rx Series FAQs
Products Covered: Rx500, Rx1000 & Rx2000
Q: Why do I need to keep my Rx firmware/software up to date?
PHABRIX regularly produces firmware/software releases that introduce new functionality, improvements to existing functionality as well as fixes for issues raised by users.
It is important to regularly check for updates and ensure that your equipment is running at its best and that you benefit from any new features, improvements and fixes. Whilst it is always our intention to allow users to update to the latest version from any previous version, this is not always possible. In certain cases, for example when new options are introduced, the automatic update system cannot function because files required for the update are not present in the currently installed version.
In these cases the release notes available in the Support – Software Release Page of the web site will detail specific manual instructions that may be required to install the latest version.
To ensure that your Rx instrument is up to date, use the Update function:
1. Ensure that the Rx is connected to a LAN that has internet access and that the Rx has the correct network configuration.
2. In the “System” – “System Info” menu select the “Download” button. This will instruct the Rx unit to check the PHABRIX web site for the latest version of Rx firmware/software. If the currently installed software is up to date then no other action is necessary. If there is newer software this will automatically be downloaded and placed in the dropdown list for installation.
3. At this point it is worth checking the Software Release Page on the website to see if there are any specific instructions about the release.
4. Once you are happy that you have taken all necessary precautions proceed to install the newly downloaded version.
Video Guide -
How to update your Rx Software via LAN from PHABRIX Ltd. on Vimeo.
Q: How do I upgrade the software in my Rx without a LAN connection?
- Download the latest available software from our Support Product Downloads page and extract the contents of the zip file into the root directory of a USB pen drive formatted as FAT32.
- Turn on the Rx chassis then immediately insert the USB pen drive into the front USB slot of the Rx chassis. A copy dialogue will appear on the HDMI screen & Rx2000 front panel.
- Copy the “release**.**.*****” File only from the left hand window to the right hand window using the “copy ->” button. This process may take a few minutes then eject and remove the USB pen drive.
- From the System – System Info menu locate the “release**.**.*****” file in the drop down list and then select “Install”. The installation process will take a few minutes.
- The Rx system should go through reprogramming its IO cards which can take few minutes, the Rx system will then power up with the new software which can be checked on the top left side of the System Info screen.
Video Guide -
Q: How do I Install new software options onto my Rx?
- Press the "Sys Menu” button followed by “System Info”
- Currently installed system options will be listed within this central box.
- Within the “System Info” window select the "Option Security Code" field.
- Clear any existing option code if present, and then enter the new code supplied to you by PHABRIX.
*Note the code is not case sensitive.* - Once you have entered the code, press enter to confirm.
- The "System Options" box will refresh, displaying a full list of activated options on the device.
- For further assistance please contact support@phabrix.com
Video Guide -
Q: What test patterns and video formats are available from the on-board CPU generator?
The following test patterns are available:
100% Colour Bars
75% Colour Bars
Check Field
The following formats are available:
SD 525i (59.94)
SD 625i (50)
SD 525i (59.94)
SD 625i (50)
HD 720p (23.98, 24, 25, 29.97, 30, 50, 59.94, 60)
HD 1080i (50, 59.94, 60)
HD 1080p (23.98, 24, 25, 29.97, 30)
3G-A 1080p (50, 59.94, 60)
3G-B 1080p (50, 59.94, 60)
Q: How do I enable the on-board test pattern generator?
The test pattern generator on the CPU module can be enabled in 2 different ways:
From the Rx2000 Front Panel:
1. Select the “System” – “HDMI/SDI Output” menu.
2. In the “HDMI Output” section select the “Enable (Restricts SDI Output” check box.
3. From the video formats drop-down list select the required format.
From the Rx1000/Rx500 Front Panel:
1. Use the left and right navigation buttons on the front panel until the “HDMI” is displayed in the center of the LED display.
2. Select the button below the LED display to turn on the HDMI output.
Q: How can I get the HDMI Monitor output on the SDI output located on the CPU?
The HDMI Monitor output can be routed to the SDI output on the CPU module. This can be done in different ways:
From the Rx2000 Front Panel:
1. Select the “System” – “HDMI/SDI Output” menu.
2. In the “CPU SDI Output” section select the “Enable” check box.
3. From the video formats drop-down list select the 3G-A format.
4. From the test pattern drop-down list select HDMI Output.
From the HDMI Monitor Output:
1. Create a new “HDMI/CPU SDI Output” window on the HDMI Monitor by right-clicking with a mouse in an empty part of the display.
2. In the “CPU SDI Output” section select the “Enable” check box.
3. From the video formats drop-down list select the 3G-A format.
4. From the test pattern drop-down list select HDMI Output.
The CPU SDI output will now be a clone of the HDMI Monitor output.
Q: How do I select the HDMI output
A: The HDMI output on the Rx instruments is always present. Just connect a 1920×1080 (50, 60, 59.94 fps) HDMI/DVI monitor to the HDMI connector on the CPU module back panel and the Rx instrument output will be displayed.
Latest Product Brochures